

Some people use Viber the same way for years: type a message, hit send, and open the app again only when a new notification pops up. Fair enough – it works. But Viber has a few useful tools in the Settings menu that fix common annoyances: blurry photos, a phone that’s running out of storage, and moments when it’s easier to show a location than describe it.
Here’s what’s there, and how to use it.
1. Choose Your Photo Quality
If a photo you sent came out softer or blurrier than expected, this setting is usually the reason. Viber gives you two ways to send images:
- On mobile, a photo you take and share is sent at your default quality setting – check it in Settings → Media → Photo Quality Menu. You can select from three options:
- “Compressed (~180 KB)”: This may result in less detail in the image but it takes less space on your phone or when sending it. Good for storage-conscious users or when image quality can be lower.
- “Good (~250 KB)”: The image is clear and of acceptable quality. Ideal for most everyday needs without significant loss of details.
- “Excellent (~650 KB)”: The image is sent in almost its original quality with minimum or no compression. Great for images with lots of detail that need zooming in.
- To preserve the full resolution, you can send an image as a file rather than as a photo. To do this, tap the + icon next to the message field, and select “File”.
- On desktop, you can choose how to send a photo when you drag it into a chat:
- Use “Drop here to send in original size” (in the upper half of the screen) for anything to zoom in or read later, like an ID, a contract, or a receipt.
- For a quick “here’s what I’m doing” photo, choose “Drop here for instant delivery” (in the lower half of the screen).

2. Share Locations Easily
Location sharing drops a map pin with your location at the moment you send it. Tap the + icon, select Location, adjust the pin if needed, and tap Send.
For chats involving frequent location requests, like coordinating with a co-parent or meeting a delivery driver, tap that chat’s info screen or user name, select Chat Info & Settings and turn on the Attach Location Always toggle (mobile only). After that, every message you send in that chat includes your location automatically, so you don’t have to re-type an address. Turn it off when you no longer need it.
3. Manage Your Media Storage
Viber doesn’t keep your photos and videos on its servers forever. If a file isn’t opened and downloaded within 14 days, it is deleted automatically. This is part of a bigger privacy habit: All personal 1-on-1 and group messages and calls are end-to-end encrypted by default, so content stays unreadable in transit – even to Viber. Not holding onto files longer than necessary follows the same logic.
Once a file is opened or downloaded, Keep media (in Settings → Media) controls how long it is stored locally (on desktop), from a week up to forever. There’s also the Media downloaded automatically setting which decides if files are saved the moment they arrive or only once you open them.
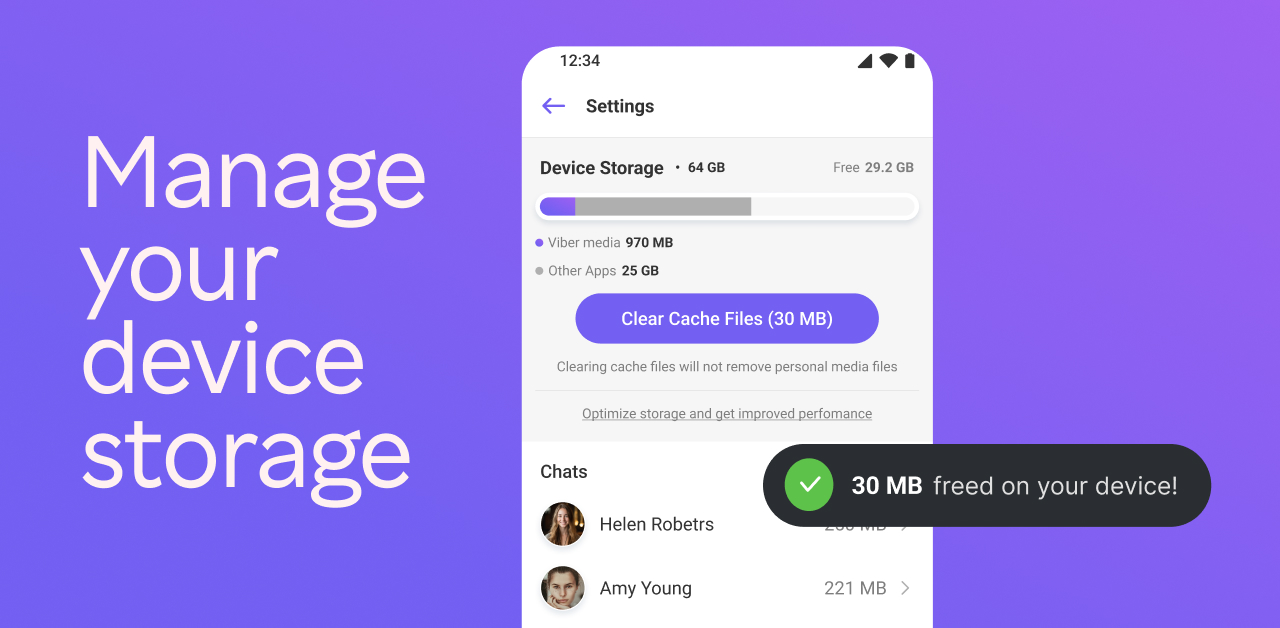
4. Free Up Storage Without Deleting Chats
Busy chats and communities add up in storage over time. Instead of deleting whole conversations, Settings → Storage → Clear Cache Files (on mobile) gives you the ability to remove cached community and channel content, without deleting your messages. The media files re-download when you reopen the chat.
Quick answers to common questions
How do I send a full-quality photo on Viber?
For full resolution on mobile, use the + icon and send the image as a file. On desktop, choose Original size when you drag an image into a chat.
Does Viber delete my photos automatically?
Any media that is unopened for 14 days is automatically removed from Viber’s servers and cannot be recovered. Once opened, you can select how long you want to keep files stored locally.
Can I share my location without sending it manually every time?
Yes. On mobile, open the chat’s info screen and turn on Attach Location Always.
What’s the safest way to free up Viber storage without losing messages?
Go to Settings → Storage and then Clear Cache Files.